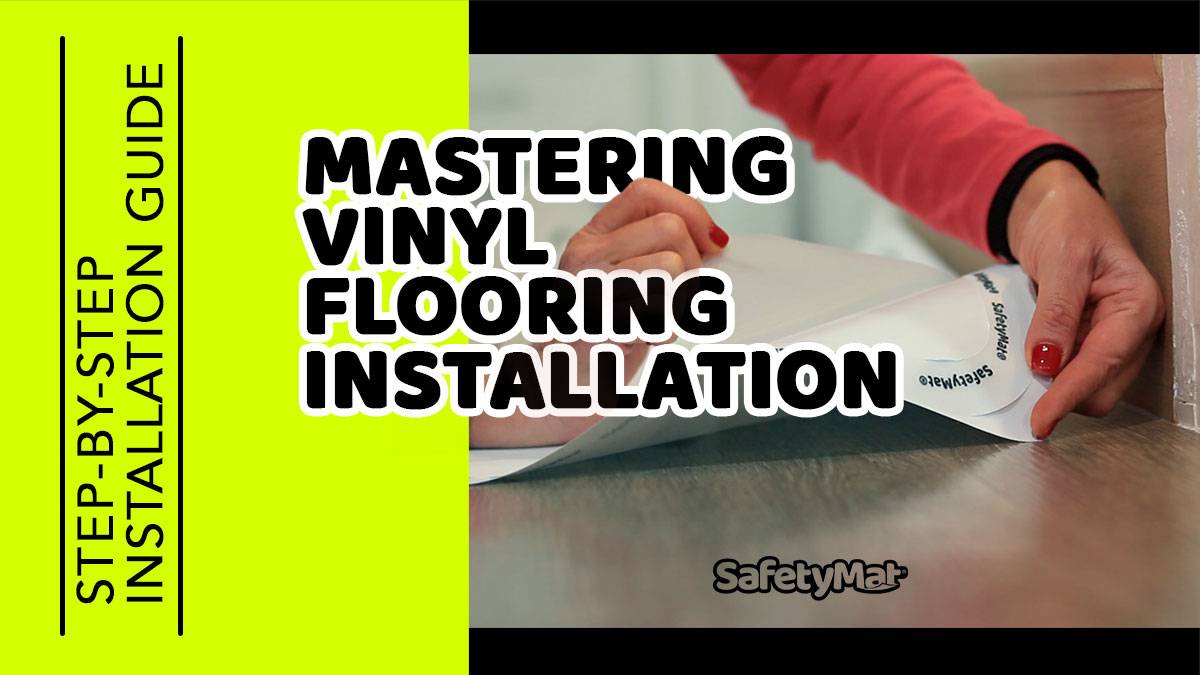
Installer Insights! Flawless Clear Vinyl Sticker Roll Installation

Clear vinyl sticker rolls bring a perfect mix of practicality and style to your surfaces. These stickers are waterproof, durable, and versatile, making them ideal for both decorative and functional purposes. Whether you’re upgrading your home decor or adding a protective layer to high-traffic areas, they deliver exceptional results. Their crystal-clear finish ensures your original surface shines through while offering a sleek, polished look. From cement and wood, to tile, these stickers adhere seamlessly, transforming your space with minimal effort. With their easy-to-use design, you can achieve a professional finish without needing expert skills.
Key Takeaways
- Prepare your surface by cleaning and ensuring it’s smooth and dry to enhance adhesive performance.
- Use essential tools like a squeegee, spray bottle with soapy water, and a microfiber cloth for a smooth installation process.
- Choose the right application method: wet for flexibility and repositioning, or dry for quick and lasting results.
- Take your time during installation to avoid common mistakes like air bubbles and wrinkles; patience leads to a professional finish.
- Practice on small surfaces before tackling larger projects to build confidence and refine your technique.
- Maintain a clean, dust-free workspace to prevent imperfections in your final application.
- Trim excess vinyl carefully for a polished look, using a sharp utility knife and taking your time to ensure clean edges.
Preparing the Surface
Proper surface preparation is the foundation of a successful clear vinyl sticker roll installation. Taking the time to prepare ensures your stickers adhere securely and look flawless. Let’s dive into why this step matters and how you can do it right.
Why Surface Preparation is Crucial
Surface preparation directly impacts how well your vinyl stickers stick and stay in place. A clean, smooth surface enhances the adhesive bond, preventing peeling or bubbling over time. Contaminants like dust, grease, or moisture can weaken the bond, leading to poor results. By preparing the surface, you set the stage for a professional finish that lasts.
Studies highlight that effective surface preparation removes contaminants and boosts adhesive performance. Skipping this step can lead to weak bonds and adhesive failure.
Steps to Clean and Prepare the Surface
Cleaning the Surface Thoroughly
Start by cleaning the surface to remove dirt, grease, and other residues. Use a mild detergent mixed with water for most surfaces. For tougher grime, consider using rubbing alcohol or a specialized cleaner. Wipe the surface with a microfiber cloth to avoid leaving lint behind. A clean surface ensures the adhesive sticks properly.
Ensuring the Surface is Smooth and Dry
After cleaning, inspect the surface for any rough patches or imperfections. Sand down uneven areas if necessary, especially on wood or painted surfaces. Make sure the surface is completely dry before applying the vinyl sticker. Moisture can interfere with the adhesive, causing it to lose its grip.
Best Surfaces for Clear Vinyl Sticker Rolls
Glass, Plastic, Metal, and Vinyl Flooring
Clear vinyl sticker rolls work best on smooth, non-porous surfaces. Glass, plastic, and metal are excellent choices because they provide a solid base for the adhesive. Vinyl flooring rolls are another great option, as their smooth texture allows the stickers to adhere seamlessly. These surfaces ensure a polished and professional look.
Surfaces to Avoid for Better Adhesion
Avoid applying vinyl stickers to porous or textured surfaces like unfinished wood, brick, or fabric. These materials can trap air and reduce the adhesive’s effectiveness. Uneven surfaces may also cause wrinkles or bubbles, making it harder to achieve a clean finish.
Gathering the Right Tools
Having the right tools makes all the difference when installing clear vinyl sticker rolls. The proper equipment ensures a smooth application, minimizes errors, and helps you achieve a professional finish. Let’s explore the essential and optional tools that will make your installation process seamless.
Essential Tools for Installation
To get started, you’ll need a few basic tools. These items are must-haves for a clean and hassle-free application.
Microfiber Cloth or an Old Cotton Shirt for Cleaning and Smoothing
A microfiber cloth or old cotton shirt is perfect for cleaning the surface before installation. It removes dust and debris without leaving lint behind. This ensures the adhesive bonds properly, giving you a flawless finish.
Optional Tools for Enhanced Results
While the essential tools are enough for most projects, adding these optional tools can take your installation to the next level.
Hair Dryer for Better Adhesion
A regular hair dryer can help improve adhesion, especially on curved or uneven surfaces. Applying gentle heat softens the vinyl, making it more pliable and easier to work with. This step is particularly useful for achieving a snug fit around edges or corners.
Measuring Tape or Ruler for Precision
Precision matters when cutting and aligning your vinyl stickers. A measuring tape or ruler ensures accurate measurements, helping you avoid mistakes. This tool is especially handy for larger projects where precision is key to achieving a polished look.
By gathering these tools before you begin, you’ll set yourself up for success. Whether you’re tackling a small DIY project or a larger installation, having the right equipment ensures a smooth and professional finish every time.
Step-by-Step Installation Process
Installing clear vinyl sticker rolls can seem tricky, but breaking it into simple steps makes the process manageable. Follow this guide to measure, cut, apply, and smooth your vinyl stickers like a pro.
Measuring and Cutting the Vinyl
Accurate Measuring Techniques
Start by measuring the surface where you’ll apply the vinyl. Use a measuring tape or ruler for precise dimensions. Mark the measurements lightly with a pencil or masking tape to avoid mistakes. Double-check your measurements to ensure accuracy. This step prevents wasted material and ensures the vinyl fits perfectly.
Pro Tip: Always measure twice before cutting to avoid errors.
Cutting Tips for Clean and Precise Edges
Cutting the vinyl correctly is just as important as measuring. Use a sharp utility knife or scissors for clean edges. Place the vinyl on a flat, hard surface, such as a cutting mat or a piece of wood, to stabilize it while cutting. For straight lines, use a ruler or straight edge as a guide. Take your time to avoid jagged edges or uneven cuts.
Expert Insight: Installers recommend using high-quality vinyl for soft surfaces. It adheres better and is easier to cut without tearing.
Applying the Vinyl Sticker
Wet Application Method for Easy Adjustments
The wet application method is ideal if you need flexibility during installation. Spray the surface lightly with soapy water using a spray bottle. Peel off the backing of the vinyl and place it on the wet surface. The soapy water allows you to reposition the vinyl until it’s perfectly aligned. Once satisfied, use a squeegee to press out the water and secure the vinyl.
Why it works: The soapy water acts as a temporary barrier, giving you time to adjust the placement without the adhesive sticking immediately.
Dry Application Method for Quick Installation
The dry application method is faster and preferred by professionals for its long-lasting results. Peel the backing off the vinyl and carefully align it with the surface. Start from one edge and press the vinyl down gradually, smoothing it as you go. Use a squeegee or credit card to eliminate air bubbles. This method works best on smooth, non-porous surfaces like glass or vinyl flooring rolls.
Professional Tip: Gregory Signs’ installation team highlights that dry installation ensures a bubble-free finish and better longevity.
Removing Air Bubbles and Wrinkles
Techniques to Smooth Out Bubbles
Air bubbles can ruin the look of your vinyl sticker, but they’re easy to fix. Use a squeegee or credit card to push the bubbles toward the edges. Apply firm, even pressure to flatten the vinyl. For stubborn bubbles, poke a tiny hole with a pin to release the trapped air, then smooth it out.
Fixing Wrinkles Without Damaging the Vinyl
Wrinkles can occur if the vinyl isn’t applied evenly. Gently lift the wrinkled section and reapply it, smoothing as you go. If the wrinkle persists, use a hair dryer on a low setting to soften the vinyl. This makes it more pliable and easier to smooth out. Be careful not to overheat, as excessive heat can damage the material.
Installer Advice: Heat tools are especially useful for curved or uneven surfaces, helping the vinyl conform seamlessly.
By following these steps, you’ll achieve a flawless finish that enhances your surfaces. Whether you’re working on glass, metal, or vinyl flooring rolls, this process ensures professional results every time.
Avoiding Common Mistakes
Mistakes during installation can lead to poor results and wasted materials. By understanding common pitfalls, you can avoid them and achieve a flawless finish. Let’s explore the most frequent errors and how to steer clear of them.
Skipping Surface Preparation
Skipping surface preparation is one of the biggest mistakes you can make. A dirty or uneven surface weakens the adhesive bond, causing the vinyl to peel or bubble over time. Dust, grease, or moisture can interfere with the application, leaving you with a less-than-perfect finish.
Take the time to clean and smooth the surface before starting. Use a microfiber cloth to remove dust and debris. For tougher grime, rubbing alcohol works wonders. Ensure the surface is completely dry before applying the vinyl. This simple step sets the foundation for a long-lasting and professional result.
Pro Tip: A well-prepared surface ensures the vinyl adheres securely and looks flawless.
Applying Vinyl in Extreme Temperatures
Temperature plays a critical role in vinyl installation. Applying vinyl in extreme heat or cold can compromise the adhesive and make the material harder to work with. High temperatures can cause the vinyl to stretch too much, leading to visible lines or bubbles. On the other hand, cold temperatures can make the vinyl brittle and less flexible.
Aim to work in a controlled environment with moderate temperatures. If you’re working on curved or uneven surfaces, use a hair dryer or heat gun to gently warm the vinyl. This softens the material, making it easier to apply and ensuring a snug fit. Avoid overheating, as excessive heat can damage the vinyl.
Did you know? Not using enough heat during application can cause the vinyl to lift or bubble later.
Using Incorrect Tools
Using the wrong tools can lead to scratches, air bubbles, and a poor finish. Low-quality or inappropriate tools often make the process harder and less precise. For example, a dull blade can create jagged edges, while a hard-edged squeegee might scratch the vinyl.
Invest in the right tools for the job. A soft-edged squeegee helps smooth out air bubbles without damaging the material. A sharp utility knife ensures clean cuts, and a measuring tape guarantees precision. Optional tools like a heat gun can enhance adhesion and make the vinyl more pliable. Proper tools not only simplify the process but also improve the final result.
Expert Insight: Professionals emphasize that high-quality tools are essential for achieving a polished and seamless finish.
By avoiding these common mistakes, you’ll save time, effort, and materials. Whether you’re working on glass, metal, or vinyl flooring rolls, careful preparation and the right techniques will help you achieve a flawless installation.
Rushing the Application Process
Taking your time during installation is key to achieving a flawless finish. When you rush, mistakes happen, and those errors can ruin the final look of your vinyl sticker. Sloppy application often leads to air bubbles, wrinkles, or misaligned edges that are hard to fix later. Slowing down ensures every step gets the attention it deserves.
Start by preparing your workspace. Make sure you have enough room to work comfortably and lay out all your tools within reach. A clutter-free area helps you focus and reduces the chances of accidents. Double-check your measurements before cutting the vinyl. Even a small miscalculation can waste material or leave gaps in coverage.
When applying the vinyl, work methodically. Begin at one edge and press the sticker down gradually, smoothing as you go. Use a squeegee or credit card to eliminate air bubbles and ensure even adhesion. Avoid stretching the vinyl too much, as this can thin it out and create visible lines or bubbles. Think of it like wrapping a gift—you wouldn’t rush through it if you wanted it to look perfect.
Pro Tip: Professionals recommend using gentle heat from a hair dryer or heat gun to make the vinyl more pliable. This technique helps it conform to curves and edges, giving you a seamless finish.
If you encounter issues like wrinkles or bubbles, don’t panic. Lift the affected section gently and reapply it, smoothing it out carefully. For stubborn bubbles, poke a tiny hole with a pin to release the trapped air, then press the vinyl flat. Taking these extra moments to fix mistakes ensures a polished result.
Remember, patience pays off. By slowing down and focusing on each step, you’ll avoid costly errors and achieve a professional-looking installation.
Tips for a Professional Finish
Achieving a professional finish with clear vinyl sticker rolls requires attention to detail and a few simple techniques. These tips will help you elevate your installation, ensuring it looks polished and lasts longer.
Working in a Clean, Dust-Free Environment
A clean workspace is essential for a flawless application. Dust and debris can stick to the adhesive side of the vinyl, creating bumps or imperfections. Before you start, wipe down your work area and the surface where you’ll apply the vinyl. Use a microfiber cloth to remove any lingering particles. If you’re working on vinyl flooring rolls, ensure the floor is swept and mopped thoroughly.
Pro Tip: Avoid working in areas with strong air currents, like near fans or open windows. Airborne dust can settle on your surface mid-installation.
By keeping your environment clean, you’ll prevent unwanted particles from interfering with the adhesive, giving your project a smooth and professional look.
Applying Even Pressure During Installation
Even pressure is key to avoiding air bubbles and wrinkles. When applying the vinyl, start from one edge and work your way across the surface. Use a squeegee or a credit card to press the vinyl down firmly. Move in small, overlapping strokes to ensure every section adheres evenly.
If you’re using the wet application method, applying consistent pressure helps push out excess water, allowing the adhesive to bond securely. For the dry method, even pressure ensures the vinyl sticks smoothly without gaps or bubbles.
Why it matters: Uneven pressure can leave parts of the vinyl loose, leading to peeling or bubbling over time. Taking your time and applying steady force ensures a long-lasting finish.
Trimming Excess Vinyl for a Polished Look
Once the vinyl is applied, trimming the edges gives your project a clean and professional appearance. Use a sharp utility knife or scissors to cut away any excess material. Hold the blade at a slight angle and follow the edge of the surface for precise cuts. For straight lines, use a ruler or straight edge as a guide.
If you’re working on curved surfaces or corners, take extra care to avoid jagged edges. A heat gun or hair dryer can soften the vinyl, making it easier to mold and trim around tricky areas. This step is especially important when working with vinyl flooring rolls, as clean edges contribute to a seamless look.
Installer Insight: Professionals recommend trimming slowly and in small sections to avoid mistakes. Rushing this step can lead to uneven edges that detract from the overall finish.
By following these tips, you’ll achieve a polished and professional result. Whether you’re enhancing glass, metal, or vinyl flooring rolls, these techniques ensure your project stands out for all the right reasons.
Practicing on Small Surfaces Before Larger Projects
Starting small can make a big difference when working with clear vinyl sticker rolls. Tackling a smaller surface first helps you build confidence and refine your technique before moving on to larger, more challenging projects. Think of it as a warm-up that sets you up for success.
Why Start Small?
When you practice on a small surface, you get a feel for how the vinyl behaves. You’ll learn how to handle the material, apply even pressure, and smooth out air bubbles effectively. Mistakes are less costly on a smaller scale, giving you room to experiment without wasting too much material. This approach also helps you identify any adjustments you might need to make in your process.
Pro Tip: Use leftover pieces of vinyl or test on an inconspicuous area to practice your skills without worrying about visible errors.
Steps to Practice Effectively
Choose a Manageable Surface
Pick a small, flat surface like a glass panel, a section of a countertop, or even a piece of scrap material. These surfaces are easy to work with and allow you to focus on perfecting your technique.
Gather Your Tools
Have all your tools ready, including a squeegee, spray bottle with soapy water, and a microfiber cloth. Practicing with the same tools you’ll use for the main project ensures consistency.
Follow the Full Process
Treat your practice session like the real thing. Clean and prepare the surface, measure and cut the vinyl, and apply it using either the wet or dry method. Pay attention to details like trimming edges and removing air bubbles.
Evaluate Your Work
Once you’ve finished, take a close look at the results. Check for smooth adhesion, clean edges, and a bubble-free finish. If something didn’t go as planned, figure out what went wrong and adjust your technique.
Benefits of Practicing First
Practicing on small surfaces saves you from frustration later. It allows you to work out any kinks in your process and boosts your confidence. By the time you move on to larger projects, you’ll know exactly what to do and how to do it. This patience and preparation lead to a more polished and professional result.
Remember: Rushing through the process often leads to mistakes. Taking the time to practice ensures you’re fully prepared for success.
By starting small, you set yourself up for a smoother, stress-free experience when tackling bigger installations. It’s a simple step that makes a huge impact on the quality of your final project.
Installing clear vinyl sticker rolls becomes a breeze when you prepare properly and use the right tools. By following the steps outlined in this guide, you’ll achieve a smooth, professional finish that enhances your surfaces. Whether you’re working on glass, metal, or vinyl flooring rolls, attention to detail ensures long-lasting results. Take your time, trust the process, and enjoy the transformation. Start your project today with confidence, and let your creativity shine through every application.
Transform Your Space Today!
Discover the perfect blend of style and safety with our Clear Vinyl Sticker Roll. Click to order yours now! Shop Now